 I don’t know about you, but I like to keep my files local and not in the cloud. That means, I need to maintain regular backups to ensure I don’t lose my financials and other data I’ve maintained electronically over a couple of decades.
My desktop has three hard drives, a system drive, a media drive and a data drive. The system is the “system” and I don’t store data or media for long term use and access on the system drive. I’ve had to replace a failed system drive a few too many times and know better. The “media” drive has all of my photos, music, video and books, both ebooks as well as audiobooks and that baby, at 4tb is near full at this point. The data drive contains all of my records and financial data going back years as well as copies of software installers for all of the programs I use, including Windows system installers. That is a 3tb drive and not nearly as full as the media drive.
So, you can see that I have quite a bit of data. I have TWO backups of all that data … did I mention that I’m a bit OCD about my data? I have an older PC that has FOUR 4tb drives as well as a NAS that also has FOUR 4tb drives installed. I use them to store my backups.
I use a program called “SyncBack” for backing up all of my data. I have the paid Pro version, but the free version works nicely as well and I use that version on my laptop. It makes the job of backing up, synchronizing, and restoring data files a simple task as SyncBack allows you to create profiles that I can run at the click of a button. And, if I choose, I can create schedules that will automatically “run” at specified times, daily, weekly or monthly. I save my files “locally” … but if you have the internet bandwidth as well as the storage space required to save it on a cloud service, for example, to a Google Drive or OneDrive, you can do that as well.
You can get the “free” version here: https://www.2brightsparks.com/freeware/index.html
Once you have SyncBack installed and launched, you’ll need to set up your first profile.
Creating and Configuring your First Profile
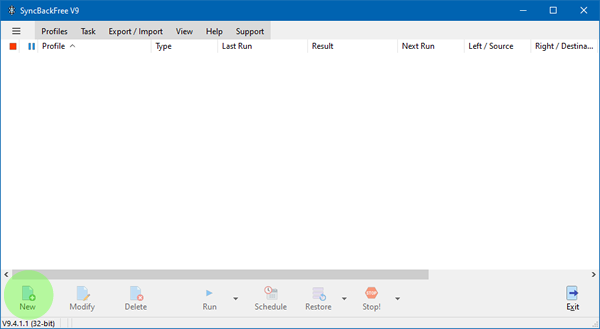
After SyncBack starts, you will see the main interface. To create a profile, click the NEW button at the bottom-left of the window.
 |
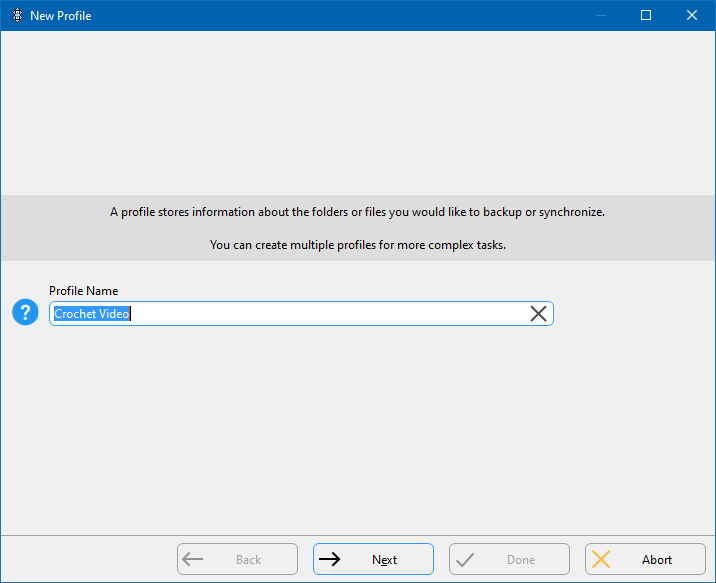
| Enter a name for your backup and then click NEXT. In my case, I have a number of crochet videos that I want to back up, so I’m going to enter “Crochet Video.” |
|
 |
| A new window will appear asking you “What type of profile do you want to create?” |
|
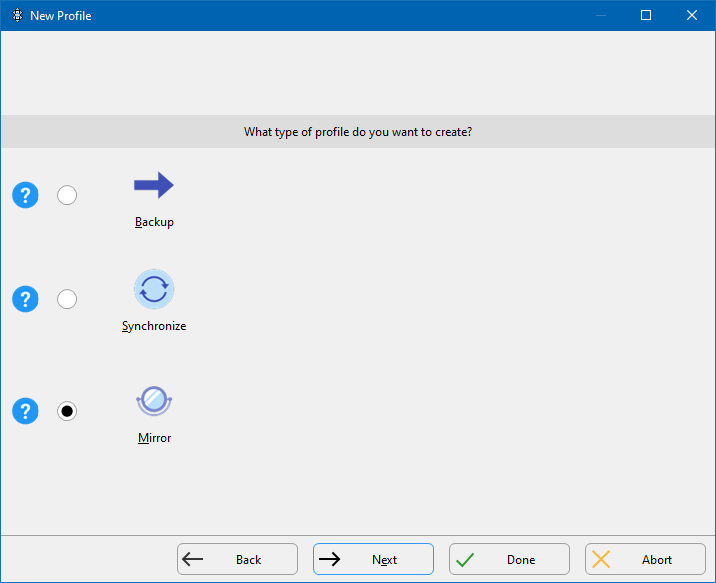 |
There are basically THREE types of backups you can use: Backup, Syncronize and Mirror. You can click on the question mark to the left of each radio button to get more information about what each type of backup mode does.
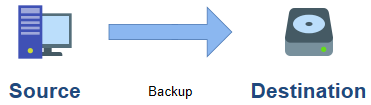
- Backup: This creates a one-way copy from your source (e.g., from your desktop to your NAS). It does not “delete” any files in the process
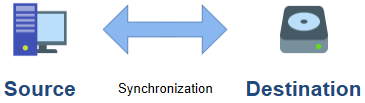
- Synchronize: This creates a two-way path to make sure the files are the same in both locations. I’ll give you an example of when this might be useful. I have a desktop PC as does my spouse. We also each have a laptop. We both have access to the NAS and from time to time, we’ll deposit a file to maintain directly on the NAS from one of our laptops after returning from a road trip. To make sure I have access to that file directly from my desktop PC, I’d want to select “syncronize.”Syncback uses Intelligent Synchronization which keeps track of what has changed since your rant the profile last. After running it the first time, it will recognize if a file has been deleted, created, or changed since the last profile run. This helps you (and SyncBack) make an informed decision about what to do when something changes. It also gives you a comprehensive choice of options on what to do with a file when specific things happen, e.g. the file is deleted for the source but not the destination.
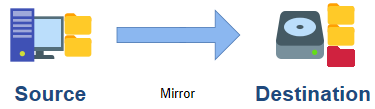
- Mirror: Selecting this choice creates a “mirror” of your source directory on the destination. This method WILL DELETE files on the destination if they are NOT in the source directory. Using my example above, let’s say after a trip, hubby deposited a bunch of photos from the trip in the Photos directory on the NAS. If I set up a “Mirror” profile from my Photos directory and ran it, all of his photos would be deleted from the NAS since they weren’t in MY photos directory.
NOTE: If you make an inappropriate selection, you will be given a chance to change that after creating your profile, a window will appear showing you what it’s going to do on both source and destination directories, and if any files would be deleted on either. If that’s not what you intended, you can change it before actually running your profile for the first time.
Once you’ve decided and selected the appropriate backup type you want to use, click NEXT.
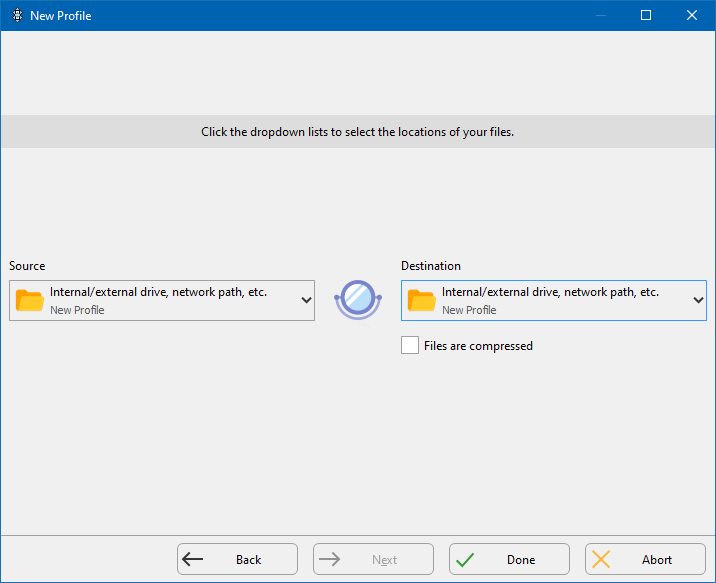
A new window will appear asking you to set up your source and destination paths. Clicking the dropdown menu on either side will reveal all the various resources that SyncBack can backup to (or from). However, for the purpose of this demonstration, we will leave both Source and Destination as default and click Done. |
|
 |
|
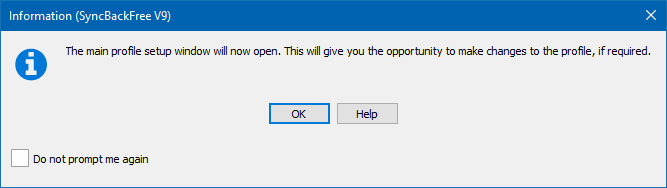
| After you’ve clicked on “Done” … a new informational window will appear stating that the “main profile setup window appear once you’ve clicked “OK.” |
 |
|
| Note that we didn’t set up the destination paths above. Instead, we’re going to set those up in the “Simple” Profile Setup window instead. |
|
 |
|
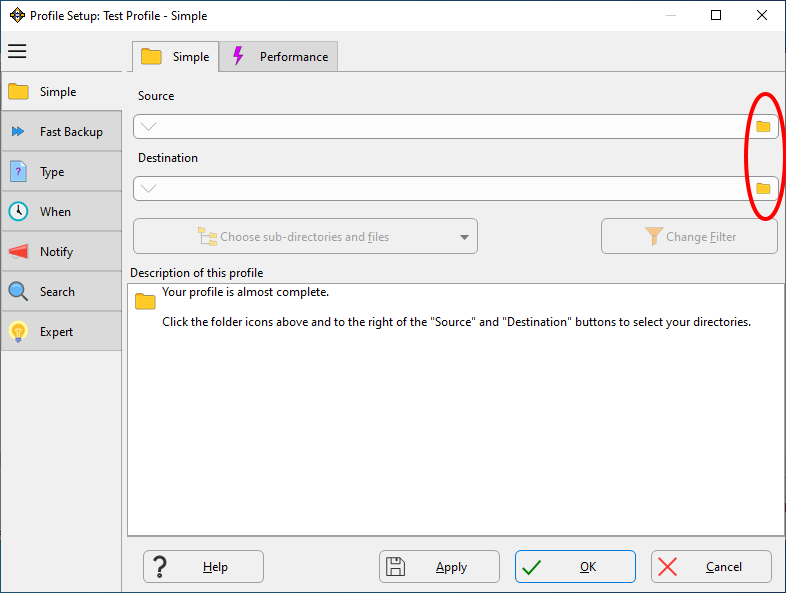
| Define the locations on your home network WHERE Syncback can find your SOURCE documents and the DESTINATION as to where copies are to be maintained by clicking the folder icons circled in RED in the above graphic. |
 |
|
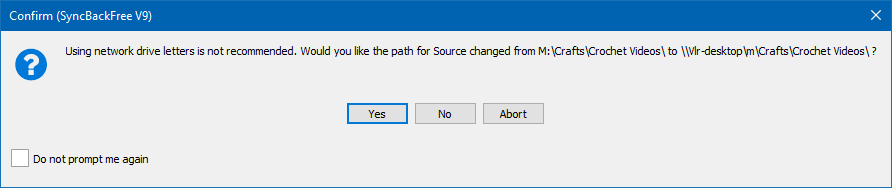
| In my case, MY “source” is a folder on my “media” drive (M:\) and my destination is our NAS drive on our home network. Your basic profile is now set up and it can be run manually from the main window after your click the OK button. A confirmation window will appear asking if you want to perform a “simulated run.” Click YES to see how files would be affected on both source and destination drives (without changing any files whatsoever), or click NO to be taken back to the main SyncBack application window. |
 |
|
| Once you return to the main SyncBack application window, you will now see the new profile you’ve created. Here’s a screen copy of mine. You can now run that profile by clicking on it once to highlight it, and then clicking on the RUN button in the menu at the bottom of the window. |
 |
For this demonstration, I set up a “Manual Mirror” backup that I would need to execute before heading to bed each night. I could, however, have set up profile that would run automatically on a set schedule instead. I’ll explain that in Part 2.


