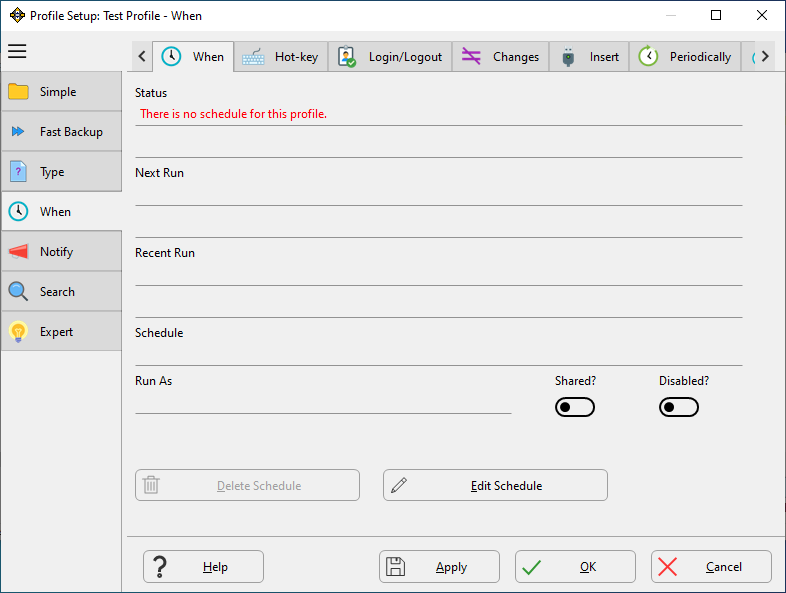
 Okay, let’s say you don’t want to have to remember to manually back up your files and you want SyncBack to do that automatically for you. Well, you can do that. If you already set up your profile and saved it before setting up a schedule … all you need to do is highlight the profile you want to change, and click the MODIFY button at the bottom of the application window. When the “profile setup” window appears, click on the WHEN tab along the left side of the window.
 |
|
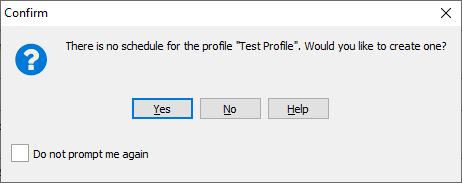
| With the WHEN tab open click on the EDIT SCHEDULE button on the open tab (it’s just above the Apply and Open buttons). A window will appear indicating that you haven’t yet created a “schedule” and ask you if you want to create one.. Click YES. |
 |
|
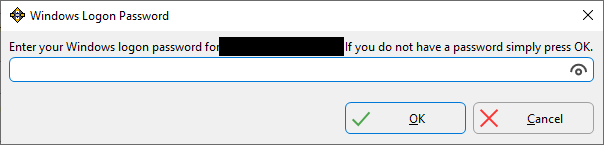
| If you have no Windows login password (which is unlikely) then you must click Yes., otherwise click NO. You are then prompted for your password. NOTE: if you’re using Windows10 you must enter your password to be able to get the Windows Task Scheduler to execute your task. Once you’ve entered your password, click B. |
 |
|
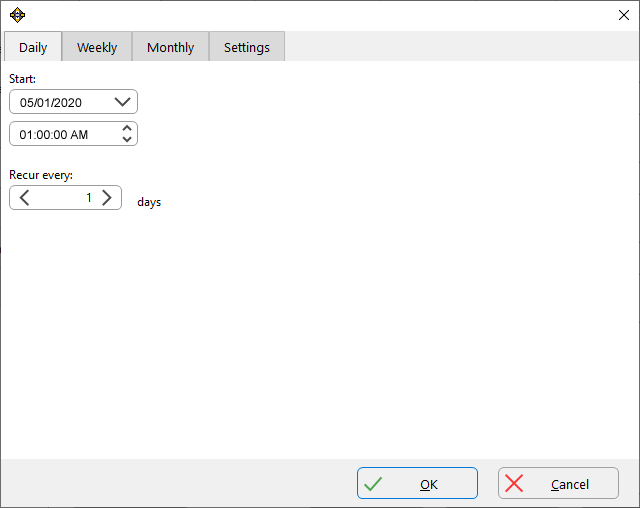
| The Scheduler Window will now appear. Let’s say I’m in the middle of setting up a number of tutorials for a crochet project I’m working on, so I want to make sure not to lose any of my work and I want SyncBack to back up videos daily, overnight as I sleep. Enter the date SyncBack needs to start daily backups and the time of day to start each backup. |
 |
|
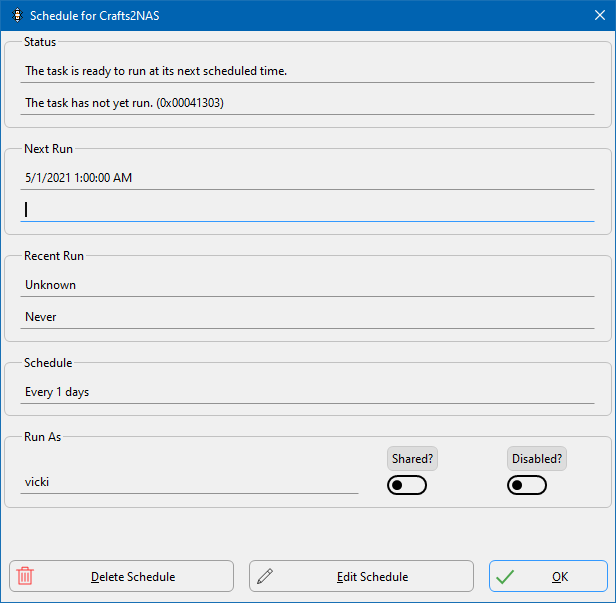
| From the tabs at the top of the window, you can click on Daily, Weekly or Monthly for automatically running your task. You can also set the Recurrence day to X number of days. On the “monthly tab, you can also specify on “which weeks” during the month you want it to run as well as which days of the week. For the purpose of this demonstration, I’ve specified that I want it to run daily, starting on 5/1/2020 at 1 AM each morning. Click OK to continue. |
 |
|
| Once you click OK, a confirmation window will come up asking you whether you want to start a “simulated run.” Click YES to do so, or NO to be taken to the main SyncBack application window. There, you will see the updated profile reflecting when it will next automatically run. |
 |
That’s your first scheduled task, if you’ve followed along. Set up some more …


